Setting up Docker
For this exercise, we are going to configure Docker so that you can see your first container in action. Proceed as follows:
- Sign up on Docker Hub at the following URL: https://hub.docker.com/ signup?redirectTo=/subscription%3Fplan%3Dfree.
- Next, proceed to download the Docker application and install it. For the remainder of the exercise, it will be assumed you are running from a Windows machine. After installing the Docker application, you may be required to restart your machine.
For Windows, use the following link: https://desktop.docker.com/win/ stable/amd64/Docker%20Desktop%20Installer.exe.
For Linux, use the following link: https://hub.docker.com/ search?q=&type=edition&offering=community&operating_ system=linux.
For Mac, use the following link: https://hub.docker.com/editions/ community/docker-ce-desktop-mac.
- After installation on Windows, you will want to update the Windows Subsystem for Linux 2 (WSL 2) package. Run the following link and restart your machine: https://wslstorestorage.blob.core.windows.net/wslblob/wsl_ update_x64.msi.
- Once Docker is set up, run the following command for your first Docker image. Launch an administrative PowerShell session for this and add the following command, then press Enter:
docker run -d -p 80:80 docker/getting-started
The following screenshot shows the output of the preceding command:

Figure 11.6 – First Docker container
Note that this command runs a pull command for a docker/getting-started image.
Top Tip
If you are one of the users that face an issue when running the previous command, try running the following command to fix Docker: cd “C:\ Program Files\Docker\Docker. Then, press Enter and add the following code: ./DockerCli.exe -SwitchDaemon. Following this, press Enter.
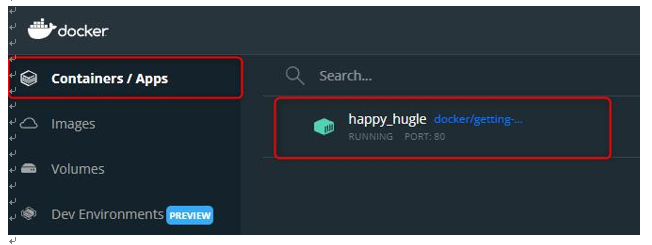
After running this command, you may open the Docker Desktop application, and if you click Containers / Apps on the left menu, you will notice an image on the right, as illustrated in the following screenshot. A name is randomly generated each time you create a container unless you specify otherwise:

Figure 11.7 – First Docker container: Docker Desktop
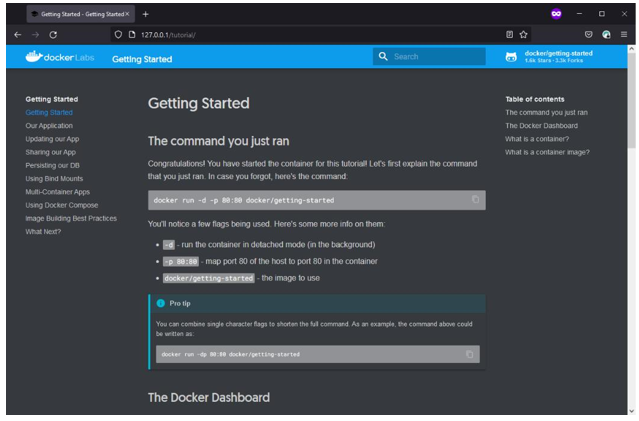
You will note that this is running on port 80, which means the application is accessible as a web application locally. To access this, launch a browser and navigate to the following URL: http://127.0.0.1. You will see a success message, along with guidance on other exercises you can follow, as illustrated in the following screenshot. We encourage you to carry this out and learn more:

Figure 11.8 – Using your Docker container
Now that you have successfully installed Docker and run your first container from a precompiled image, we will explore the creation of your first image and publish it to Docker Hub.
