Moving VMs from one resource group to another
In this section, we will perform the migration of a VM from one resource group to another. We will validate readiness for the migration and then work through the process:
- Open the Azure portal and navigate to the resource group where your VM is saved.
- Select the Overview option on the left menu and select each resource to be moved that is associated with the VM, then click Move:
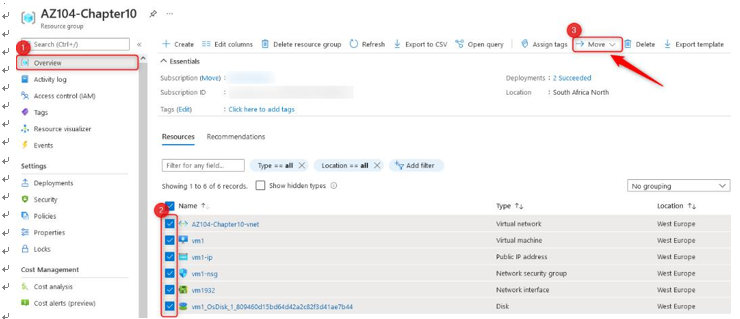
Figure 10.27 – Selecting Azure VM resources
- Select the Move to another resource group option:
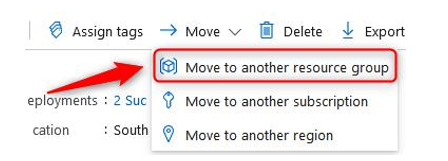
Figure 10.28 – Move to another resource group
- Select the target resource group and click Next:
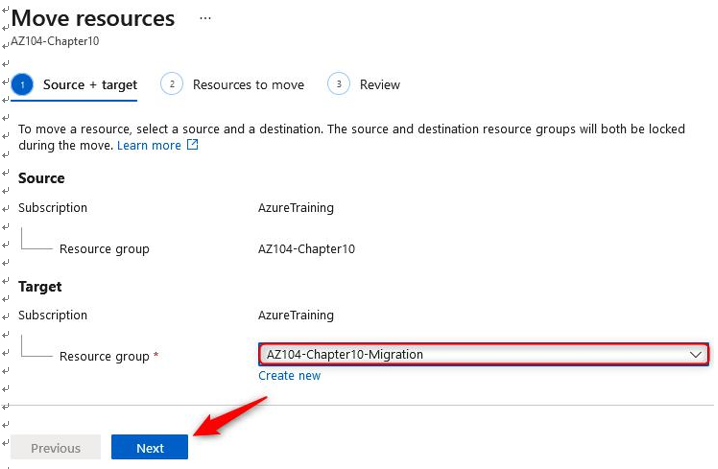
Figure 10.29 – Moving Azure resources – Source and Target
- Wait for the validation to complete that confirms the resources can be migrated:

Figure 10.30 – Resource migration validation message
- Once validation has been completed successfully, click Next:
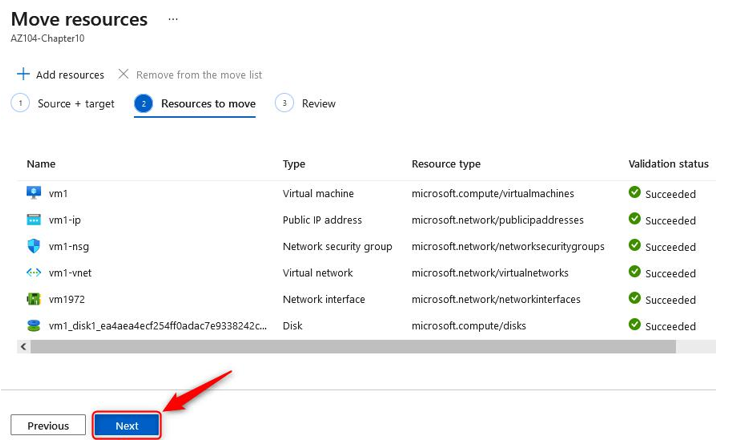
Figure 10.31 – Moving Azure resources – Resources to move
- Click the checkbox and click Move:
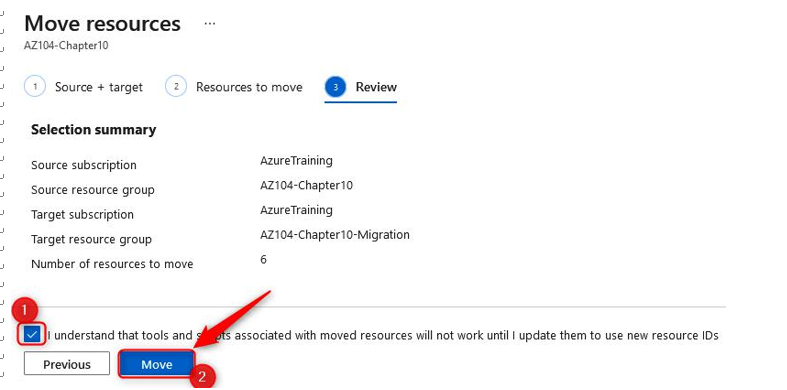
Figure 10.32 – Moving Azure resources – Review
- The move will take several minutes to complete. Once complete, you will receive a notification informing you of the success status:
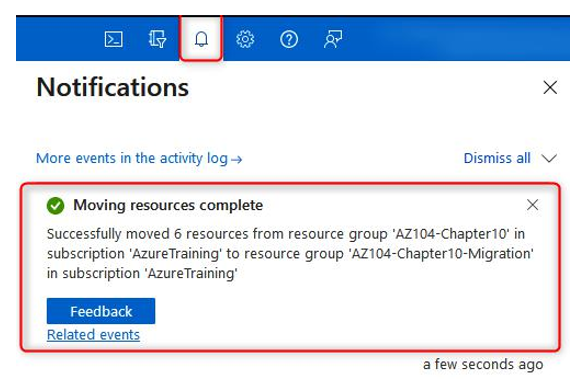
Figure 10.33 – Move success notification
Top Tip
You may be tempted to think that migrating a resource from one resource group to another would change its location, but this is not the case. You will remember that resources can reside in a different location to the resource group. Further, a resource location cannot, at the time of writing, be changed and will require redeployment for the desired location.
You have completed the migration of resources across resource groups. This process is almost identical in behavior when performing a migration across subscriptions. In the next section, we discuss redeploying VMs.
Redeploying VMs
There are occasions when you may experience some difficulties in working with VMs and identify that certain services aren’t functioning as expected, such as remote desktop connections using the Remote Desktop Protocol (RDP) or other types of services. In these circumstances, you may find that redeploying a VM will help. The redeployment will result in your VM moving to a new node within the Azure infrastructure. This will obviously also result in the VM shutting down during the move and restarting on the new node. All your configurations and associated resources will still be retained.
Top Tip
When you redeploy a VM, take note that the dynamic IP assigned to your VM will be updated, and your temporary disk data will be lost.
- Navigate to the VM that you wish to deploy. On the left menu pane, near the bottom, click on the Redeploy + reapply option:
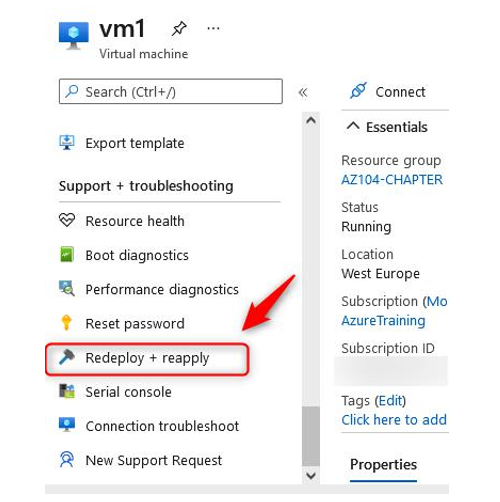
Figure 10.34 – Redeploy + reapply
- Click the Redeploy button:
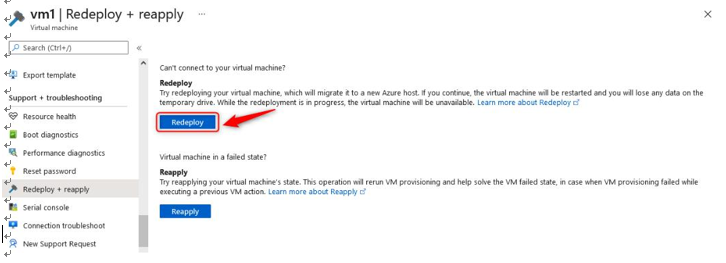
Figure 10.35 – Redeploy
- You will see a notification that the process has started:

Figure 10.36 – Redeploy notification
- You will receive a success message signifying successful reallocation for the server:

Figure 10.37 – Redeploy success notification
Now that you have redeployed a VM using the Azure portal, we will explore redeploying a VM using PowerShell.
Redeploying a VM from PowerShell
To redeploy a VM from PowerShell, you will perform the following steps:
- Navigate to the Azure portal by opening https://portal.azure.com.
- Open Azure Cloud Shell again by clicking the following menu item in the top-right menu in the Azure portal:

Figure 10.38 – Top navigation bar
- Make sure that, this time, PowerShell is selected.
- Add the following line of code to redeploy the VM:
Set-AzVM -Redeploy -ResourceGroupName “PacktVMResourceGroup” -Name “myVM1”
That brings us to the end of the VM redeployment topic. Next, we will explore what Azure disk encryption is and how to configure it.
