1 April, 2021
0 Comments
7 categories
Deploying your first Azure container instance
For this exercise, you will create a container group and then deploy a container instance to the group with the following steps:
- Sign in to the Azure portal at https://portal.azure.com.
- Open the resource group you will be using for this exercise, click Overview on the left menu, then clickCreate.
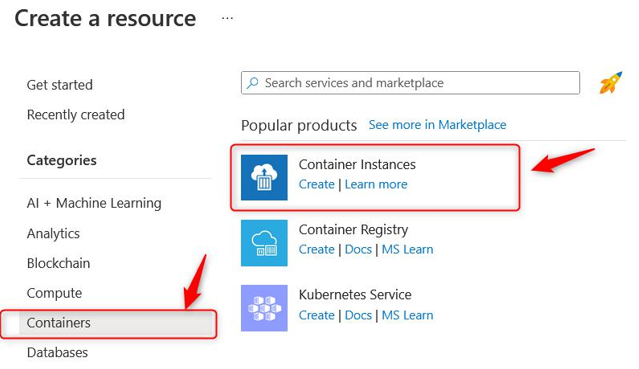
On the left menu bar, clickContainers, then click Container Instances, as illustrated in the following screenshot:

Figure 11.28 – ACI
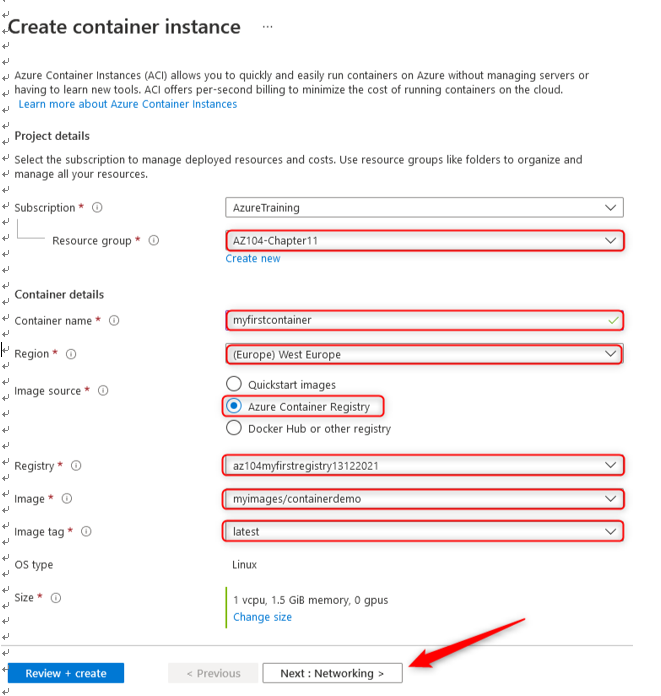
- Enter your Resource group type, then give your container a name (in this case, I have used myfirstcontainer), and then select your Region value. Now, for Image source, we will use our previously uploaded image, but you will note that you have a choice to connect to Docker Hub and other registries too. You will also have the choice to start with some Quickstart images, which are sample images created to enable you to set up your container faster. Select Azure Container Registry and select the Registry type we created in the previous exercise; the Image type will also be the one we created previously, and the Image tag value will be the latest one. Leave the Size field as the default setting. A note on sizing is that you can change this to select between one and four CPUs and 0.5 to 14 GB memory for your instance. Click Next: Networking >. The process is illustrated in the following screenshot:

Figure 11.29 – Creating a container instance
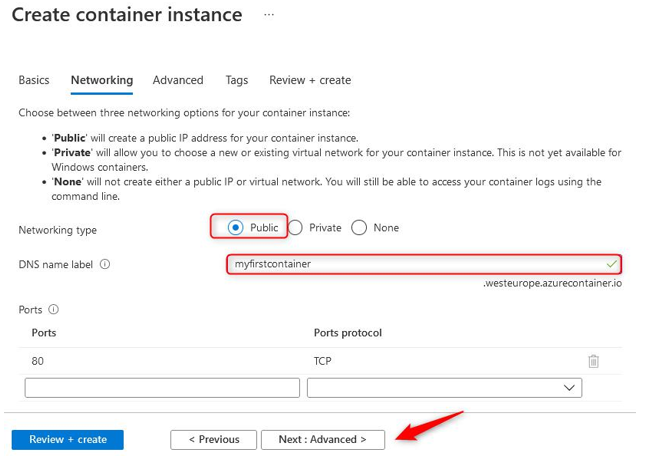
- For this exercise, select Public as your Networking type value, and create a unique DNS name label value for your container, then leave the Ports configuration as it is. Just note that we are exposing port 80 (HTTP) traffic to the internet for access to this container. Click Next: Advanced >. The process is illustrated in the following screenshot:

Figure 11.30 – Creating your container instance: Networking tab
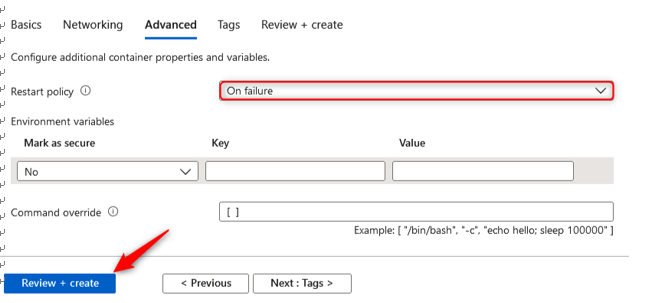
- On the Advanced tab, we can configure the Restart policy field for your container. The default option is On failure, and we will leave ours as it is. You also can configure Environment variables values. Click Review + create, then click Create. The process is illustrated in the following screenshot:

Figure 11.31 – Creating your container instance: Advanced tab
- Once your resource has been deployed, you can now connect to it on the DNS name label you configured previously.
You now know how to deploy a container instance within Azure and are ready to start your journey on containers. In the next exercise, you will explore creating your first container group.
Category: Deploy from a template, Exams of Microsoft AZ-104, Fault domain versus update domain, Microsoft AZ-104 Certification Exams, PowerShell scripts, Understanding Azure disks, VM management tasks
