Creating our first Docker image
For this exercise, you will need to first sign in to Docker Hub. Then, follow the next steps:
- Once signed in, click on the Repositories button on the top menu bar, as illustrated in the following screenshot:

Figure 11.9 – Repositories button
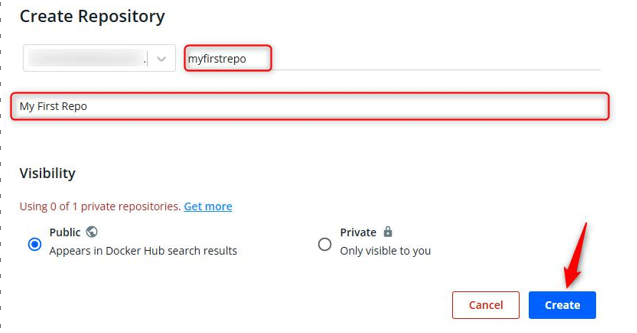
- Enter a name and description for this repository, then click Create. Note that you may select whether your repository is Public or Private too. For this repository, I’ll leave it as Public, as illustrated in the following screenshot:

Figure 11.10 – Creating your repository
- Return to your PowerShell window and paste the following command into it:
docker pull mcr.microsoft.com/azuredocs/aci-helloworld For our demonstration, we will be using the following image to demonstrate how we upload an image to Docker as well as to use this later in ACI:

Figure 11.11 – Pull of the aci-helloworld image
- Now that your image is downloaded, run docker images, as illustrated in the following screenshot, and press Enter:

Figure 11.12 – Listing all local Docker images
This command lists all images on your local system. Now, you will list all running containers on your system using the following command: docker ps. Then, press Enter.
- You will notice the container you ran from earlier in the PowerShell window. Note the name and proceed by running the following command: docker stop [container name]. Then, press Enter. To confirm the container has been stopped run docker ps, then press Enter. The process is illustrated in the following screenshot:

Figure 11.13 – Using PowerShell to manage Docker containers
- Let’s start our downloaded image; we will run it on the local port 80, and expose port 80 for connecting back to the container. Note your image name from earlier; you can run docker images to confirm, as illustrated in the following screenshot:

Figure 11.14 – Listing Docker images
- The command will be constructed as follows, after which you can run docker ps again:
docker run -d -p 80:80 mcr.microsoft.com/azuredocs/ aci-helloworld
The following screenshot shows the output of the preceding command:

Figure 11.15 – Our second container
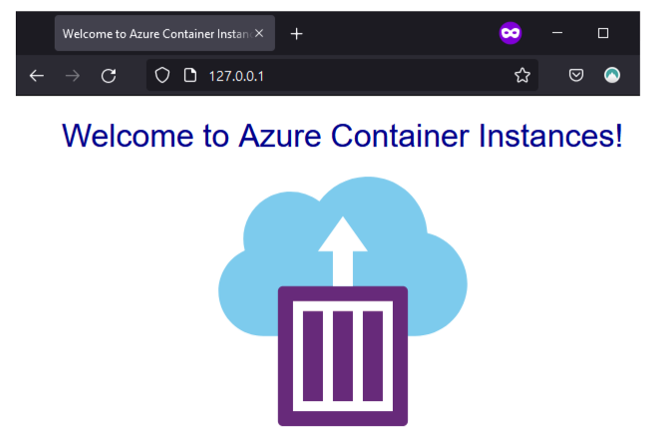
- To access this container, launch a browser and navigate to the following URL: http://127.0.0.1. You will see a welcome message, as illustrated in the following screenshot, and will then know that the application is working:

Figure 11.16 – Our second container running
- You will now push the image to your repository based on the repository name you gave earlier. You will first need to tag your image for Docker to understand which image file to push. Run the following command in PowerShell and press Enter:
docker tag mcr.microsoft.com/azuredocs/aci-helloworld [docker hub username]/myfirstrepo
The following screenshot shows the output of the preceding command:

Figure 11.17 – Pushing the Docker image
- Run docker images and note in the following screenshot our newly tagged image:

Figure 11.18 – Tagging the Docker image
- Now, log in to Docker using the docker login command. We will now proceed to push an image to your Docker repository. The easiest way to push is to follow this command on the page where we created our repository earlier:
Figure 11.19 – The docker push command
- Run this command in PowerShell:
docker push [docker hub username]/myfirstrepo
Here is the output of the preceding command:

Figure 11.20 – Pushing your first image
You have now successfully pulled and pushed an image from and to Docker Hub. In the next section, we will explore deploying an Azure container instance and using Azure as the host instead of Docker for your images.
