Creating an Azure container registry
For this exercise, we are going to create a registry in Azure Container Registry. As mentioned previously, this is very similar to Docker Hub but is native to Azure. Proceed as follows:
- Sign in to the Azure portal at https://portal.azure.com.
- Open the resource group you will be using for this exercise, click Overview on the left menu, then clickCreate.
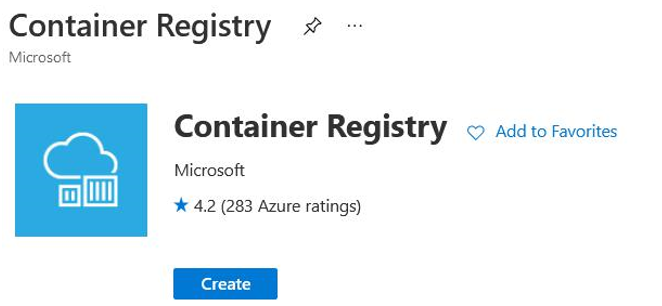
- On the top search bar, type container registry, and click the Container Registry option that appears. Then, click Create, as illustrated in the following screenshot:

Figure 11.22 – Creating a container registry
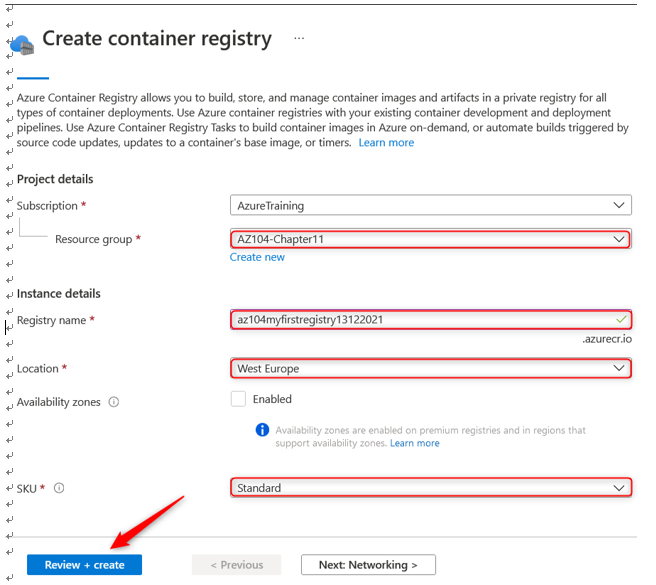
- Ensure that you have selected the right resource group, give it a unique Registry name entry, and select the appropriate Location entry. Then, we will leave the SKU value as Standard for this exercise. Click Review + create. The process is illustrated in the following screenshot:

Figure 11.23 – Creating an Azure container registry
- Click Create.
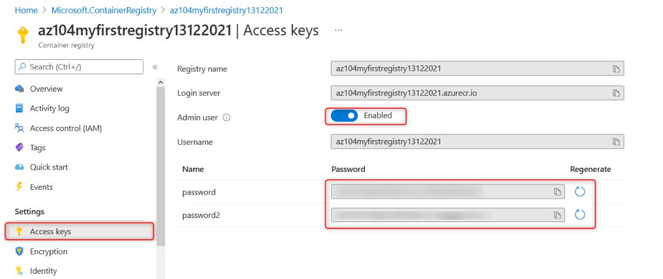
- After the deployment has succeeded, navigate to the resource. Click on Access keys on the left-hand menu. Then, on the right screen, click the toggle button next to Admin user, and note your username and passwords. This will enable you to connect to the registry using Docker. The process is illustrated in the following screenshot:

Figure 11.24 – Container registry access keys
- In PowerShell, type the following command and press Enter:
docker login [yourregistryname].azurecr.io
For your username and password, enter the username and password you just copied from the portal, as illustrated in the following screenshot:

Figure 11.25 – The docker login command
- You will now tag the image we used previously for Azure Container Registry using the following command:
docker tag mcr.microsoft.com/azuredocs/aci-helloworld [your registry name].azurecr.io/myimages/ containerdemo:latest
- You will then run the following push command to push your container to the registry:
docker push[your registry name].azurecr.io/myimages/ containerdemo:latest
The output of the preceding command is shown in the following screenshot:

Figure 11.26 – Pushing your image to Docker
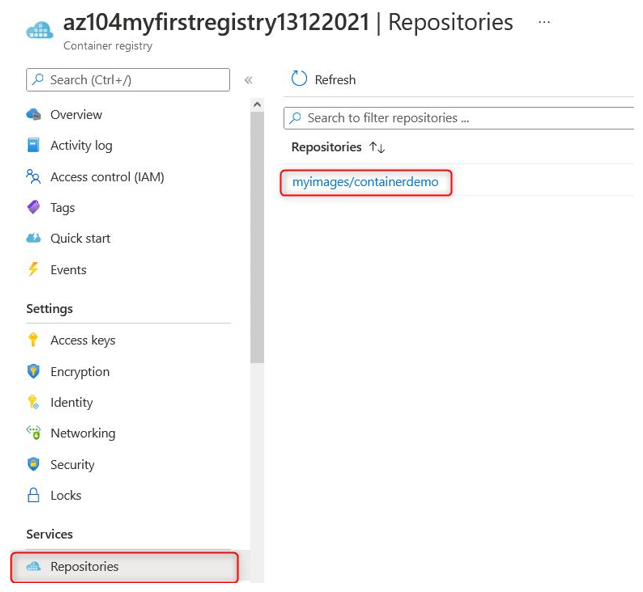
- On the Azure portal, if you navigate to Repositories on the left menu, you will now notice that your image has been uploaded to the registry, as illustrated in the following screenshot:

Figure 11.27 – Listing Azure container images
You have successfully uploaded your first Docker image to Azure Container Registry. Now that you have the basics under your belt, we will explore deploying your first container instance in the next section.
