Adding data disks
In the following exercise, we will explore adding data disks to a VM in Azure:
- Sign in to the Azure portal: https://portal.azure.com/home.
- Create a new managed disk in Azure, set the resource group to the one you used in the previous chapter, name the disk demovm1_datadisk2, change Storage type to Standard HDD, and change Size to 32 GiB. For Encryption, you can leave this as (Default) Encryption at-rest with a platform-managed key. The following is a screenshot of the configuration at the Review + create stage. Click Create:
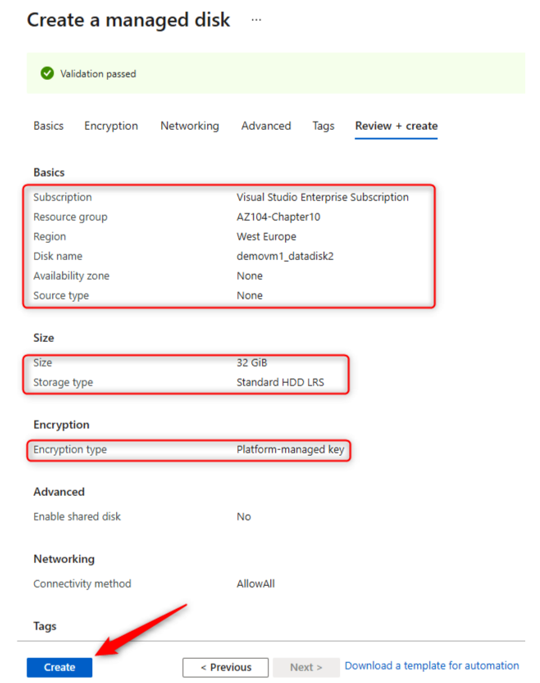
Figure 10.15 – Create a new managed disk
- Navigate to the VM you created in the previous exercise. On the left menu, under Settings, click the Disks button.
- This page will display all disks attached to the VM. Notice the OS disk deployed and attached to the VM. In the Data disks section, you will see the options to create a new disk or attach existing storage. Click Create and attach a new disk:
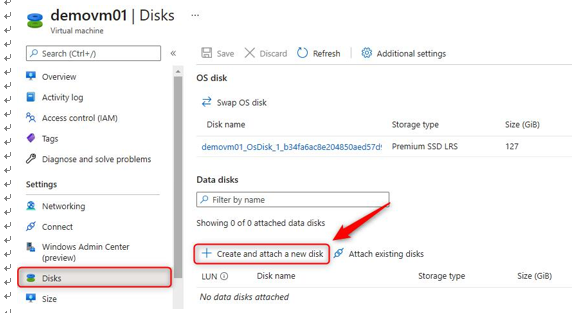
Figure 10.16 – VM – Create and attach a new disk
- Leave LUN as 0 and name the disk demovm1_datadisk1. Change Storage type to Standard HDD and change Size (GiB) to 32. For Encryption, you can leave this as Platform-managed key and Host caching can be left asNone:

Figure 10.17 – VM – Creating a data disk
- Click Attach existing disks now and select the disk you made in step 2:

Figure 10.18 – VM – Attaching a data disk
- At the top of the blade, click the Save button.

Figure 10.19 – Save
You have just learned how to create and attach a data disk to a VM, as well as how to attach an existing data disk. In the next section, we will explore the network options available for Azure.
Configuring networking
In the following sections, we will assess the connectivity of two VMs within a network, we will join two VMs onto the same subnet within a VNET, and we will prove they can communicate. We will then configure an NSG on both the NIC and subnet layers and demonstrate the net effect, and finally, connect the VMs to another subnet and demonstrate communication between the VMs.
- Sign in to the Azure portal: https://portal.azure.com.
- Navigate to the VM you created in the previous exercise. On the left menu, under Settings, click Networking.
- Note the name and subnet assigned to the NIC. Also note the private IP:

Figure 10.20 – VM networking
- Create a new VM and store this in the same resource group as your previous VM. On the Networking tab, click the dropdown for Virtual network and select the same network as your previous VM. Do the same on the subnet:
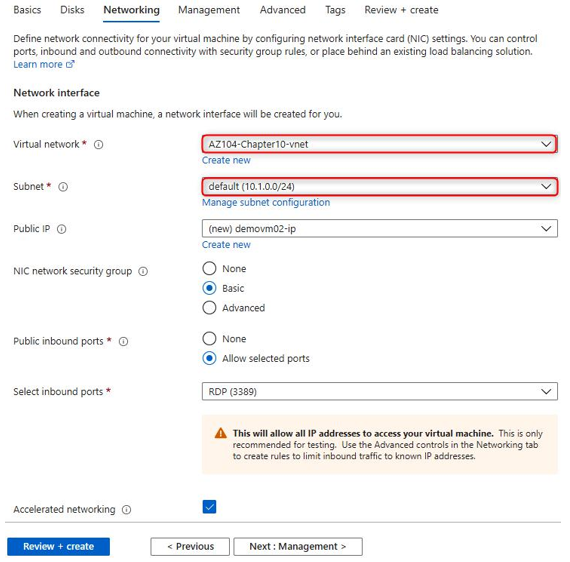
Figure 10.21 – Create a new VM store
- Navigate to the new VM you just created. On the Overview pane, click Connect:

Figure 10.22 – New VM
- Click RDP on the drop-down menu:
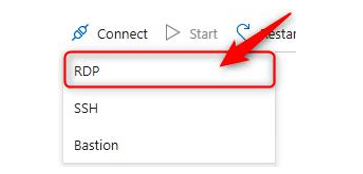
Figure 10.23 – Select RDP
- Click the Download RDP File button on the screen. Open the file that downloads:
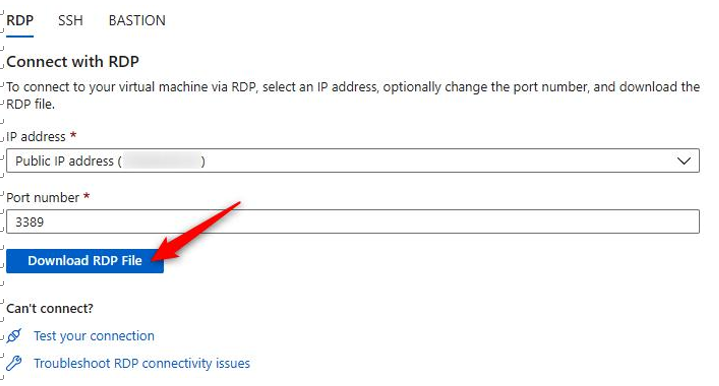
Figure 10.24 – Click Download RDP File
- On the screen that shows up, click More choices to change the username. Click on Use a different account:
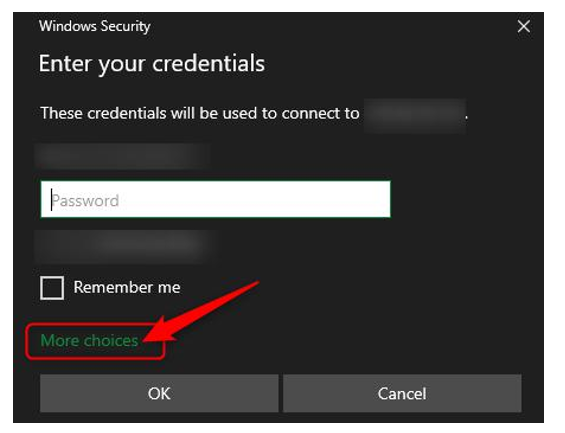
Figure 10.25 – Change account
- Enter the username and password you created when creating your VM. Click OK:
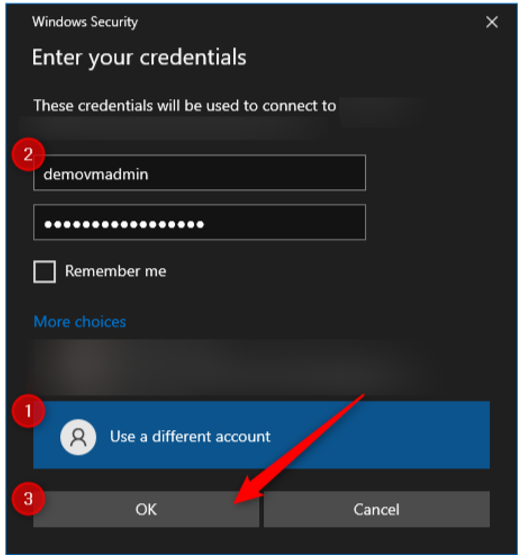
Figure 10.26 – Enter username and password
- You have just created a remote desktop connection to your VM.
- Click the Start button and type PowerShell. Click the PowerShell option that comes up on the search pane. In PowerShell, enter the following command, adjusting the private IP address to match the IP you noted in step 3:
test-netconnection 10.1.0.4 -Port 3389
- Note the successful connection.
Top Tip
Management ports, port 22 – SSH (Linux) and port 3389 – RDP (Windows), should always be restricted and preferably not exposed to the internet. If exposed to the internet, access should be restricted to specific known IP addresses.
